Throwing Away Books

jettisoning-books.jpgAn article on the NPR blog, Hard Choices: Do Libraries Really Destroy Books?, has resulted in a smattering of comments on the Book Arts Listserv recently. The article, by Linda Holmes, starts

Yesterday, an Australian blogger named S Peter Davis wrote a piece for Cracked (the surprisingly interesting online offshoot of the old comedy print magazine) called 6 Reasons We’re In Another ‘Book-Burning’ Period In History. It’s not about the destruction of books based on content or community objections; it’s about the destruction of books because libraries (and sometimes bookstores) don’t know what to do with them, or don’t know what to do with them that makes economic sense…

Having recently spent a lot of time thinning out my own belongings, I quite sympathize with libraries. Especially about getting rid of books that are out-of-date. That’s when I happened upon Awful Library Books, a site started by two librarians as

a collection of library holdings that we find amusing and maybe questionable for libraries trying to maintain a current and relevant collection…Our criteria for inclusion of titles are simply anything that amuses us. None of the books presented are particularly awful (okay, maybe some are). These books are just odd, outdated or maybe should be reconsidered under a current interpretation of collection policies.

2012 Calendar

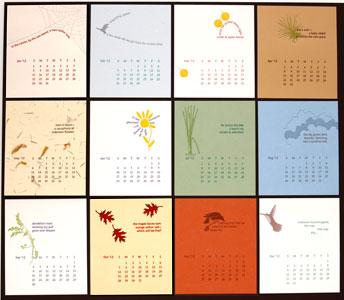
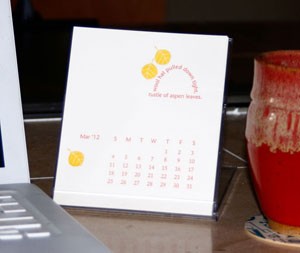
2012 Desk CalendarYeah — I’m all done. Here’s my 2012 calendar…

My inspiration this year is the quote I included on the cover:

“Excellently observed,”
answered Candide;
“but let us cultivate our garden.”

All the months are pictured below — click here to see a much larger photo. You can order a copy here.

Iridescent Letterpress

painting-hummingbirds.jpg

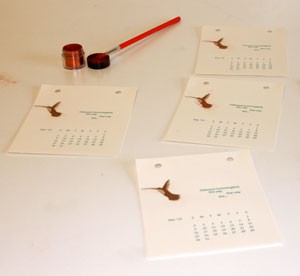
Applying the powdered pigment

hummingbird-page.jpg

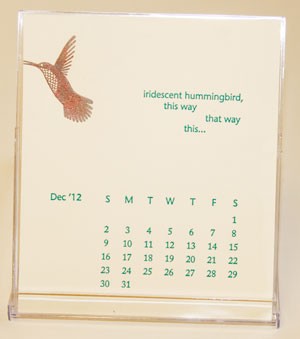
The finished calendar page
One of the haiku for my 2012 calendar starts “iridescent hummingbird” so I wanted the illustration that goes along with the poem to sparkle.
When I printed my book Winter, I had wanted to do the same thing to the stars on the cover. I tried using silver metallic oil-based ink, but the stars still looked pretty flat. Then Lisa Rappoport suggested I brush a powdered metallic pigment onto the ink before it dries to get the sparkle I was looking for. The method had worked then, so I gave it another try.
I printed the hummingbird illustration in batches of 15 or so, spread them out, and used a brush to paint on the pigment. It’s a very fine dust and painting inside the lines isn’t my forte but a squirt of compressed air to the paper got rid of the excess.
(In case you’re wondering why there are holes at the top of the sheets in the first picture, I use a pin registration system to hold the pages onto my press when printing, rather than the more traditional paper guides.)

Between Folds

Francisca PrietoAccording to Francisca Prieto’s website, she is

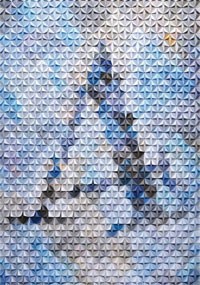
fascinated by typography. She deconstructs type to create her own three-dimensional interpretations of the things … Originally trained as a graphic designer Francisca takes a mathematical approach, which can be seen through the grids and systems applied to each piece she creates.

The piece to the left is part of her Between Folds project, where she “explores the deconstruction of rare illustrated periodicals and books using modular structures and typographical elements.” She also has a nice set of alphabet prints.
There’s an interview with Francisca here.

First Try Printing with Plastic Plates

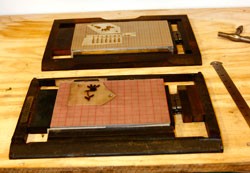
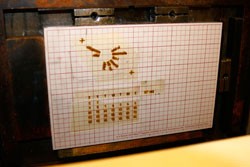
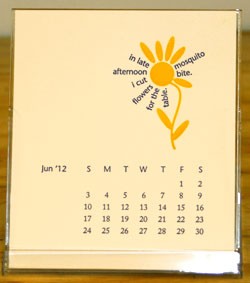
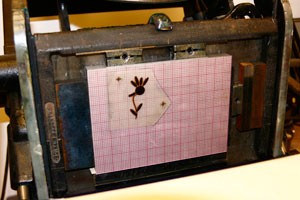
Before I converted one of my magnetic bases to take plastic plates, I bought a base from Boxcar. So I was able to compare them while printing my calendar. Most pages have 2 colors, so one base is for the first color and the second I used to register the artwork in the second color to the first color. Using the transparent plastic plates with the gridded bases has made setup and registration much easier. The pictures below are for one of the pages with fairly tight registration. I put 2 registration marks on the artwork (the little crosses you see in the 2nd and 3rd pictures). I got the first color all set up (the text and calendar), then registered the flower stem and petals on the second base in the same color. Once I was done with that, I cut off the registration marks, printed the first color (violet), cleaned the press, reinked in yellow and printed using the second base. The results are in the 4th picture below.

2-chasses-with-plastic-plates.jpg
2 chasses
cal-in-chasse-1.jpg
first base with haiku and calendar
flower-in-chasse-1.jpg
flower to be registered against first base
one-page-cal2012.jpg
finished printed calendar page

Magnetic Base to Plastic Plates

replacing-top-of-magnet-base.jpg
Removing the magnet top from my magnetic base

replacing-top-of-magnet-base-2.jpg
Removing the adhesive under the magnet

new-base.jpg
The converted base in my platen press chasse with a plastic photopolymer plate

When I started letterpress printing, the only way to print with photopolymer was to make steel-backed plates and then use a magnetic base to mount the plate in the press. Over time I’ve acquired 4 bases in various sizes. One nagging problem with these bases is that the magnet is weak to begin with and degrades over time so that the plates don’t stay put. I resort to tape and spray adhesive to keep the plates in register.
I’ve been making due with my weakened magnet bases, but as I started work on my 2012 calendar I knew I was going to have to get the magnets replaced or go to a plastic plate system. This system, introduced half a dozen years ago, uses adhesive to attach transparent plastic plates to an aluminum base. I knew there were lots of advantages to the plastic plates (for instance they are easy to cut using scissors and because they are transparent, you can align for registration more easily using marks on the base), but I was loath to buy new bases and replace the steel-backed plates I use to print coasters and book covers.
Then John Sullivan at Logos Graphics, who makes my steel-baked plates, told me he converted his magnetic bases to use with plastic plates by removing the magnet top and replacing it with a gridded mat he got at an art supply store. He attached the mat with the same sheet adhesive used on the plastic plates (he sells it for $3 a foot plus postage).

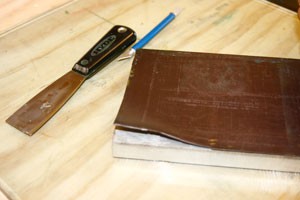
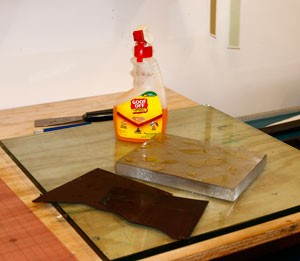
I used a xacto knife and metal ink spatula to take off the magnet top, and cleaned off the underlying adhesive with goof-off. Then using the sheet adhesive I got from John, I applied the gridded mat.
Some final gory technical details: One mat won’t make the base high enough and John suggested red pressboard (available from NA Graphics) but I didn’t have enough, so I adhered a second mat to the bottom of the base. It helps to have a measuring caliper to get the right height. A Boxcar aluminum base is .854″ high, my magnet converted base was .860″ before and after conversion.