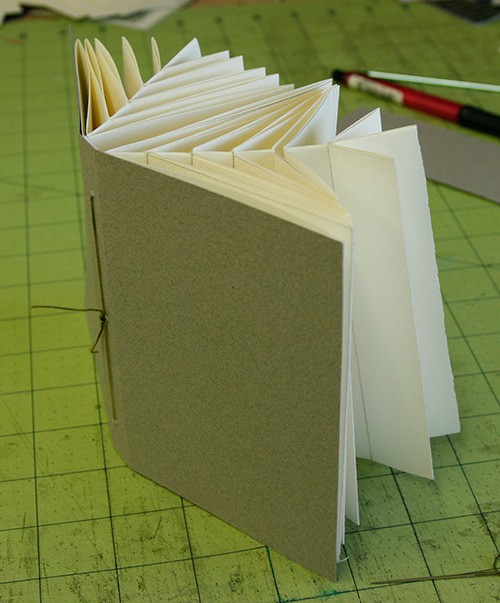
The other day I asked if anyone knew how to make a spine using the “fishbone folding technique.” It’s apparently a Hedi Kyle structure. Lily Hoy put a comment on that post explaining how to make the fold, and then sent me some illustrations. I’ve spent a happy morning trying it out and making several versions. Below is one of them, and following that is the instructions. To cut to the chase, a summary is in this downloadable PDF. There’s also an Excel spreadsheet to help calculate where to score the paper. Many many thanks to Lily for taking the time to post the instructions and send me illustrations. UPDATE: Most posts about this fold are here, with examples and alternate ways to make the fold.
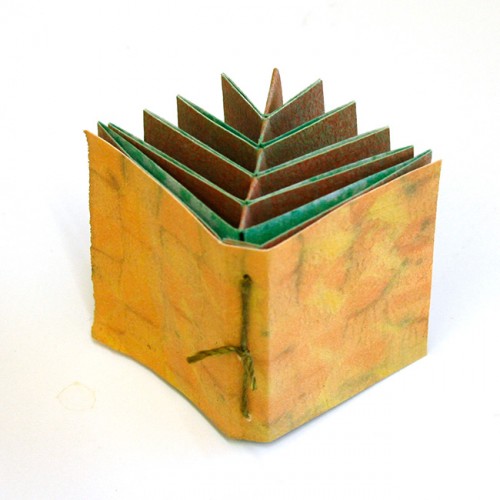
Lily explains
This is a combination fold that combines the single sheet vertical 8-page book instruction (with the slit on the long fold) with half-inch increments between the “bone” sections. Each bone section is the measurement of the prior bone section plus the half-inch. So the bone sections are 1, 1-1/2, 2, 2-1/2, 3, 3-1/2 inches wide. The last section is only a half bone that is used with a double pamphlet stitch to join the two bone strips to the cover. I was able to get six “bones” in my “signature” from a 36 inch long strip, grain long, of Arches Text Wove paper.
Here’s the layout on a 35+” piece of paper, to make a 3-1/2″ wide book. I used a 38-1/2×10 piece of Arches Text Wove to get a 3-1/2×5″ book (later on in this post are measurements for a smaller piece of paper, as well as instructions for making a book of any size).
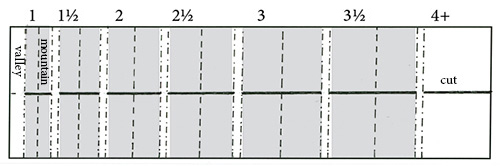
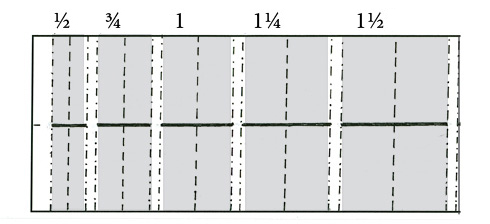
Starting from the left, you’ll need score lines at 1″, 2″, 3″, 3-1/2″, 5″, 6-1/2, 7″, 9″, 11″, 11-1/2″, 14″, 16-1/2″, 17″, 20″, 23″, 23-1/2″, 27″, 30-1/2″, 31″ and 35″. (The PDF has these in a nice table format.)
I scored my paper, then folded it, then unfolded and made the cuts. The cuts are in the center, so in my case at 5″ from the bottom.
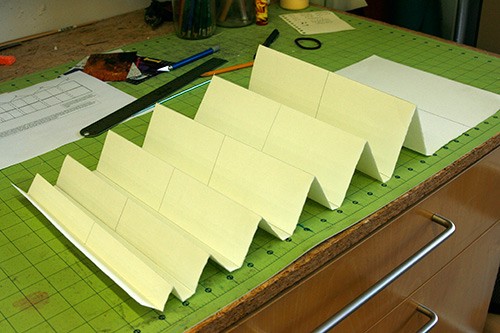
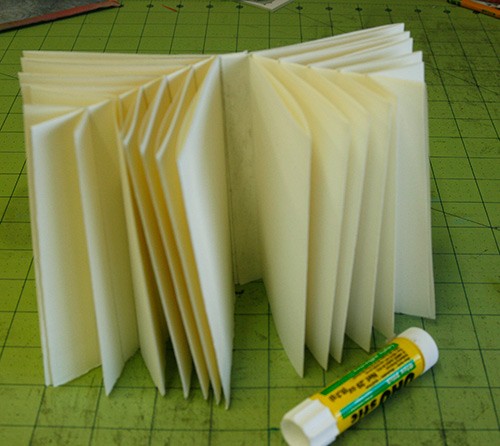
Here is the paper scored and folded. Notice that the “bones” get larger from left to right.
Next I made the cuts, in the center of each “bone.” Then I folded the paper in half, along the cuts, long edge to long edge.
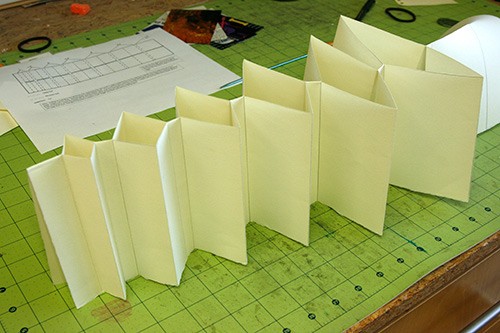
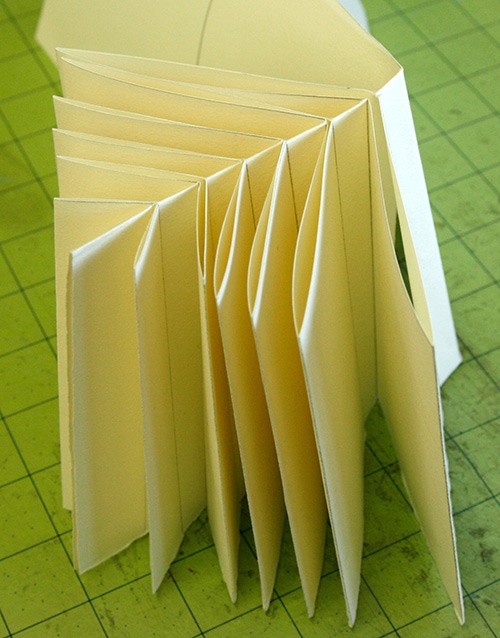
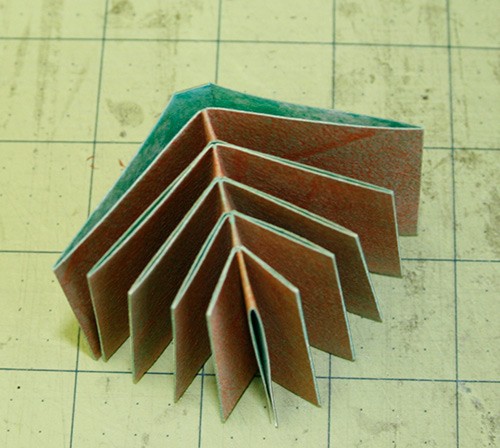
One at a time, push the larger bones toward the smaller ones, from left to right…

until you’ve made the entire spine. In this case there will be 6.
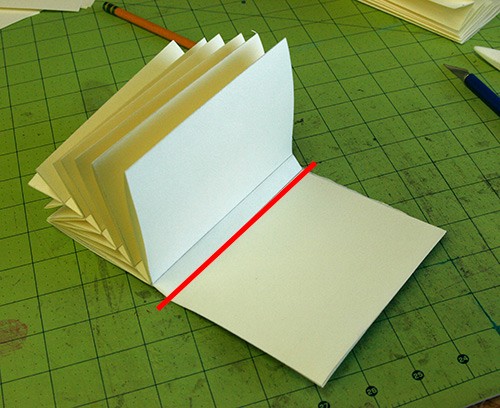
Now to attach a cover. There are probably many ways to do that; in what follows I’ll show 2 of them. The picture that my friend Sharon sent me has 2 fishbones. So I made a second one. Then I cut off the excess of each one (the extra panel on the right), leaving a 1/2″ tab.
I opened each one up, put glue on the 1/2″ tab, refolded and bonefolded the tabs together. This would help keep the tabs together when I sew them into the cover.
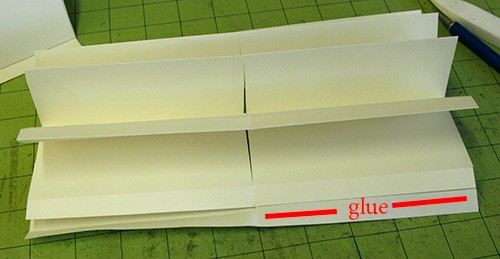
The I tacked the 2 fishbones together with a glue stick, again to make it easier to sew into the cover. The fishbones have a top and a bottom—the top has the cuts you made along the center. The bottom doesn’t look so much like a fishbone. Be sure to have both fishbones right-side up when you glue the tabs together (I did is wrong the first time!)
I made a very simple cover out of scrap cover stock that is 7-1/2″ x 5″. I folded a 1/2″ spine in the center, aligned it on the back of the tabs I had glued, poked a few holes and sewed them together with a pamphlet stitch.

The book doesn’t stay closed with this cover. However the picture Sharon sent has a wrap around cover with a flap and tie that would do a much better job.
You probably can’t tell from the photos, but the second fishbone is shorter than the first, because I goofed on my measuring. But when I was all done, I like that book isn’t symmetrical.
What about a book with a single fishbone spine?
Or if you don’t have gigantic sheets of paper?
If the piece between the bones is 1/4″ rather than 1/2″ and the first bone is 1/2″ rather than 1″, 5 bones can be made on a 11-3/4×4″ sheet, resulting in a 2×1-1/2″ book.
Starting at the left of the sheet, you’ll need to score at 1/2, 1, 1-1/2, 1-3/4, 2-1/2, 3-1/4, 3-1/2, 4-1/2, 5-1/2, 5-3/4, 7, 8-1/4, 8-1/2, 10, 11-1/2 (Use this Excel spreadsheet to figure this out for your spacing and initial bone size.)
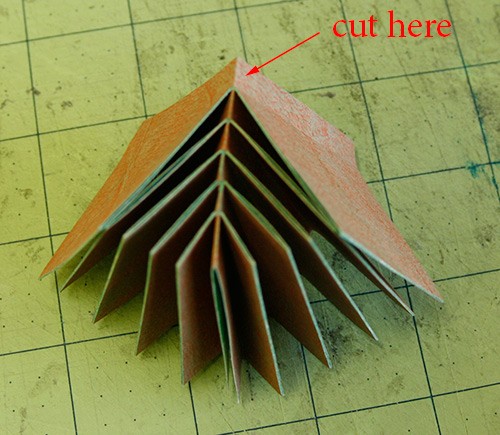
I used a piece of paste paper for the bones. Here it is all folded. Then I cut the score on the little tab at the end
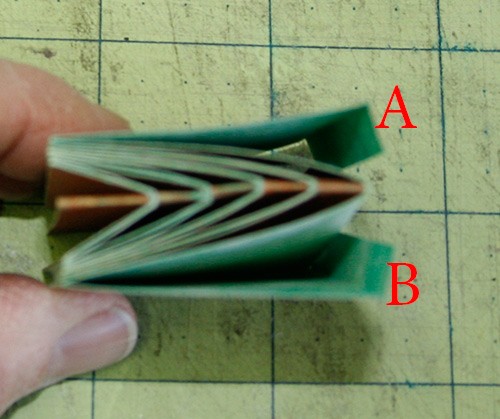
Then I glued the 2 tabs (A & B below) together
I used another piece of paster paper, 3-1/4×2″, for the cover. I folded a 1/4″ spine in the cover, aligned the spine with the tabs I glued in the previous step, and attached it with a pamphlet stitch to get this:
Some downloads to help make this book
Lily’s illustrations and score calculations are in this downloadable PDF. She also mentions adjusting the divisions to deal with heavier paper.
Use this Excel spreadsheet to figure out where to score—just fill in the space between the bones and the first bone width (the first 2 lines of the spreadsheet) and the rest is figured out for you.
Thank you!
This is so generous of you – thank you!
Beautiful, most appreciated. If we make this up into a book how do we credit all the people involved in this structure?
Beautifully done. Thank you so much for the tutorial!
Hurray! And thanks for so much information and photos. The fuchsia glue strip is especially helpful. Now, to ponder what to do with such a structure!
Linda: I would just give Hedi Kyle credit. –Susan
Thanks so much for demystifying this interesting technique.
Thank you, that makes sense to credit Hedi Kyle. Again, I love this and I am hoping to use it this weekend.
That Hedi, what a jewel of a person, what a beautiful mind.
Thank you for posting the instructions. I’d seen an image of this binding but couldn’t find more information until now.
Thanks for these instructions The spreadsheet seems to have an error. The spacing is is different than in the pdf. I think some of the spacing calculations are missing from the spreadsheet.
Thanks QP. I’ve fixed the spreadsheet.
Susan
Thanks for these instructions!
Love this and can hardly wait to try it.
Thanks for providing these instructions. Is there any gluing of the book pages, or does it operate as a type of accordion once it is attached to a cover?
Lynn: I found that for me, the book looked neater if the first fold was glued together, but the rest of the “bones” stay put without glue. For the pictures in this post, they aren’t glued.
Susan